


Your cart is empty !
It's flat around here...
We offer a paddle-cutting and handle-gluing service to adjust your fixed paddle to the desired length, which you can select when ordering a fixed length paddle.
You may also contact our workshop for specific requests (cutting, repairs, etc.).
If you prefer to perform the cutting and gluing yourself, follow the steps below.

Tape measure
Pencil or marker
Miter box
Hacksaw
Masking tape
Sandpaper (80/120 grit)
Sanding block
Two-component epoxy glue
Disposable gloves
Cloth or paper towel
Hair dryer or heat gun

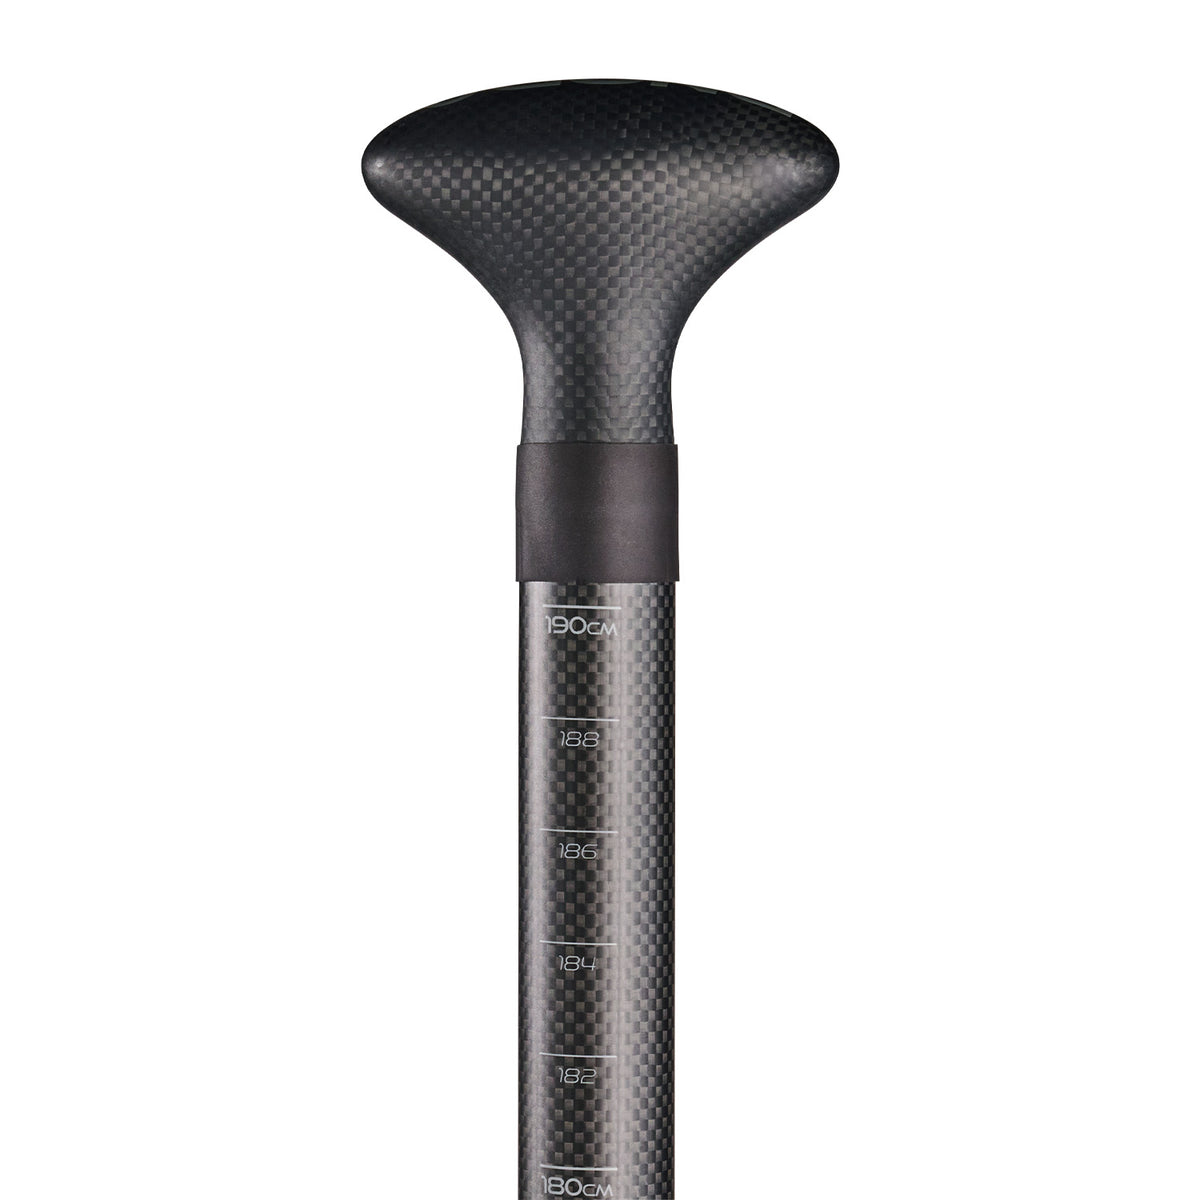
The measurement is taken overall, meaning from the bottom of the blade to the top end of the handle.
Before cutting the shaft, first measure the height of the handle alone (not counting the part that goes inside the shaft). This height must then be subtracted from the final desired paddle length.
Example: on our Carbon Pro paddles, the handle measures 8 cm. So if you want your paddle to be 180 cm, cut the shaft at 172 cm from the lower end of the blade.
Place the end of the tape measure on the tip of the blade (facing upward), take the measurement, and mark the point with your marker.
Wrap masking tape around the shaft at the cutting area. Take the measurement again precisely and draw a line.

Tip: The masking tape helps mark the cut cleanly and prevents the carbon from delaminating during the cut.

Place the paddle in the miter box to ensure a straight cut.
Using the hacksaw, cut slowly and let the saw do the work, don’t force it, or you risk crushing or cracking the carbon.

Good to know: A used or slightly worn hacksaw blade will make a cleaner cut with less risk of tearing carbon fibers.
Once cut, remove the masking tape from the shaft and handle.
Gently sand the edge of the shaft to remove burrs or leftover carbon fibers. Sand flat, then at a slight angle.
Also sand the inside of the shaft (where the handle will insert) and the portion of the handle that will go inside. The goal is to “scratch” the surfaces to improve adhesion for the epoxy. These areas should no longer be shiny.


Mask the shaft with tape several centimeters down from the cut, and do the same on the handle. When you insert the two parts, if the resin amount is sufficient, it will overflow onto the masking tape and protect your paddle.
Good to know: The glue ensures the paddle’s watertightness. If glue overflows all around the joint, it indicates a good seal with no water infiltration.
Don’t forget to slide the heat-shrink sleeve onto the shaft before gluing. This sleeve will cover the joint once the paddle is sized. You cannot add it afterward. It is optional and mostly aesthetic; you may choose not to use it and simply make the cleanest finish possible.


Epoxy glues are easy to find in hardware stores or supermarkets and often come in dual tubes or syringes. Avoid fast-setting epoxies; they won’t give you enough time to properly position the handle.
Apply a layer of glue inside the shaft and on the portion of the handle that will be inserted.


Insert the handle immediately.


Now align the handle precisely: Place the paddle in front of you with the blade on the ground (face down) and close one eye. The top of the handle must align perfectly with the bottom of the blade. Adjust if necessary.
Important: The handle orientation is correct when the GONG logo is upright (readable) when holding the paddle ready to paddle.
If unsure: when the shaft is placed perfectly flat on the ground, the blade and handle must both point upward. It is impossible to place the shaft flat if the handle is oriented incorrectly.


Wipe any excess glue again, without twisting the handle.
Some paddles come with a small plastic or rubber heat-shrink sleeve. When the handle is fully glued, slide the sleeve over the joint between the handle and shaft. It provides a clean finish by hiding the glue line. This sleeve does not waterproof the paddle, the glue does that job.